Title: Alternator Bearing Replacement - 40 amp ( ST1100 ) *
Post by: KoTAOW on October 02, 2009, 09:48:44 PM
Post by: KoTAOW on October 02, 2009, 09:48:44 PM
Originally posted on st-owners.com:
http://www.st-owners.com/forums/showthread.php?t=55159
Written by Pat O'Bryant, aka sirepair, STOC 7105:
~~~
You will need a vise, hammer, a punch, a pointed punch and an appropriately sized "sleeve" (I used an old mini-mag flashlight barrel) to remove the bearings.
Getting ready to split the alternator.
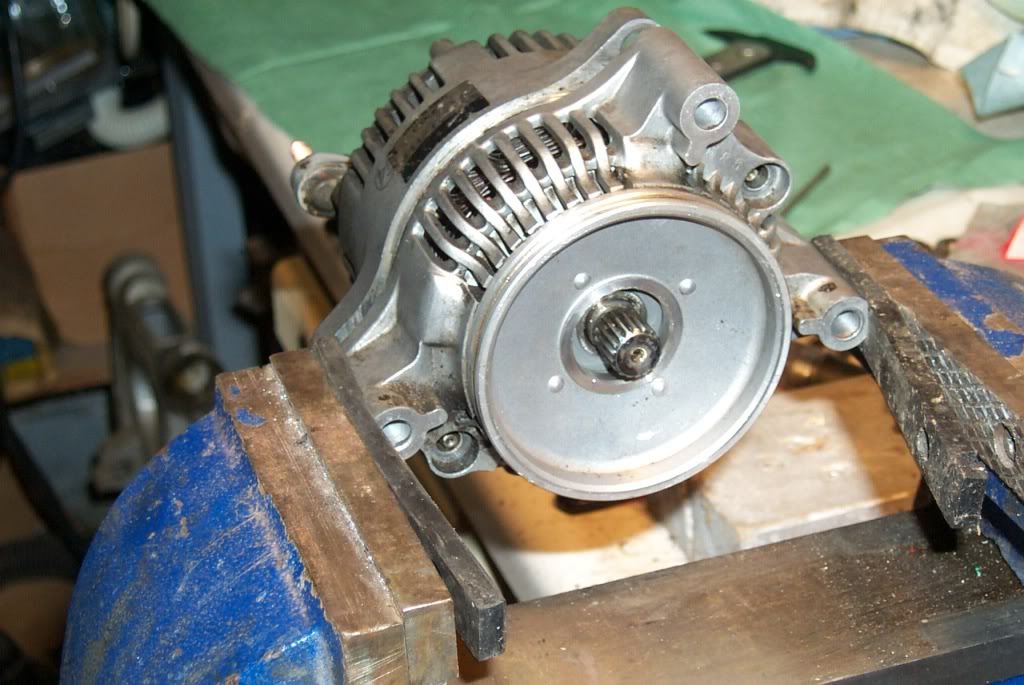
Once the alt has been removed from the bike and the regulator/rectifier has been removed, place it in the jaws of the vise so that you are only grasping the "front" half of the housing. Use the punch and hammer to drive the shaft, along with the back half of the housing, out of the front half. Mine was pretty tight and took some "persuasion"! Might want to soak a bit with penetrating oil.
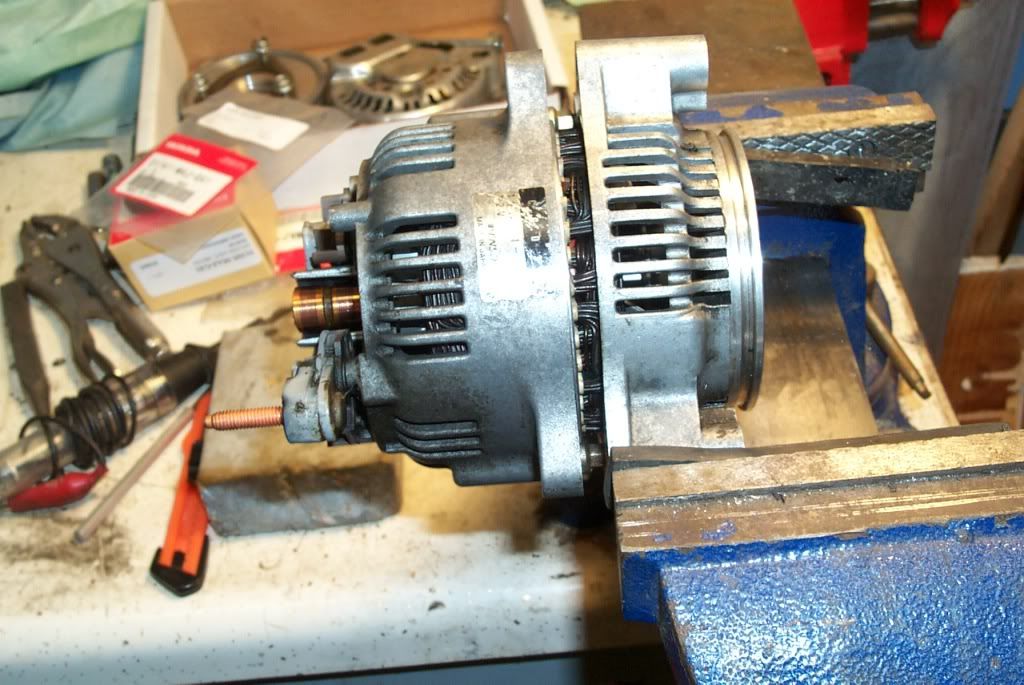
Half way there!
I used some emery cloth to lightly clean up the shaft where the bearing resides.

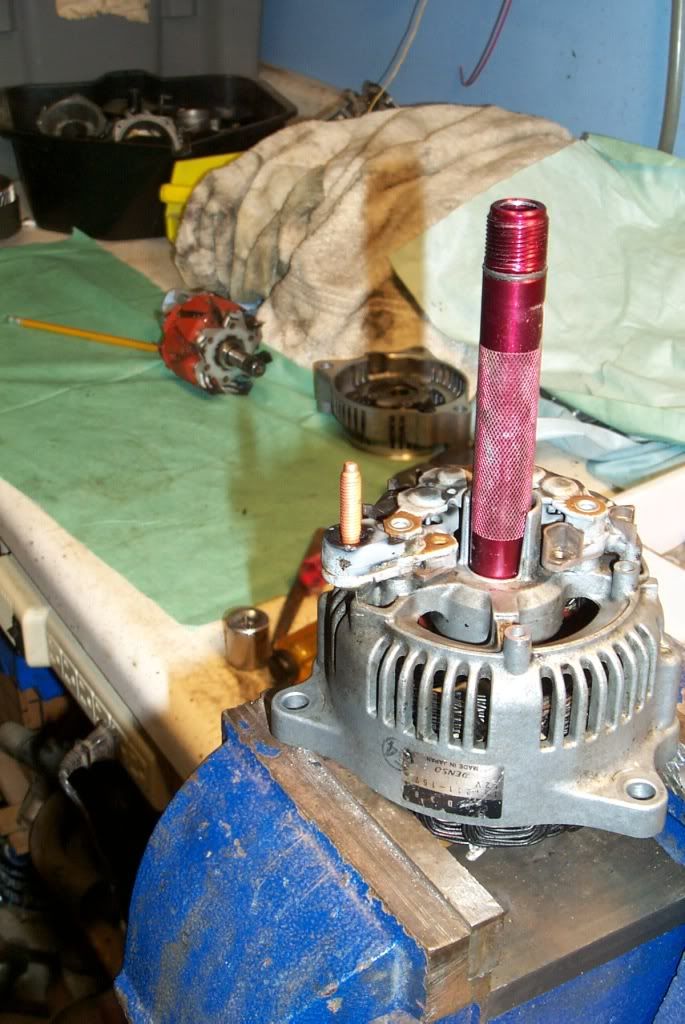
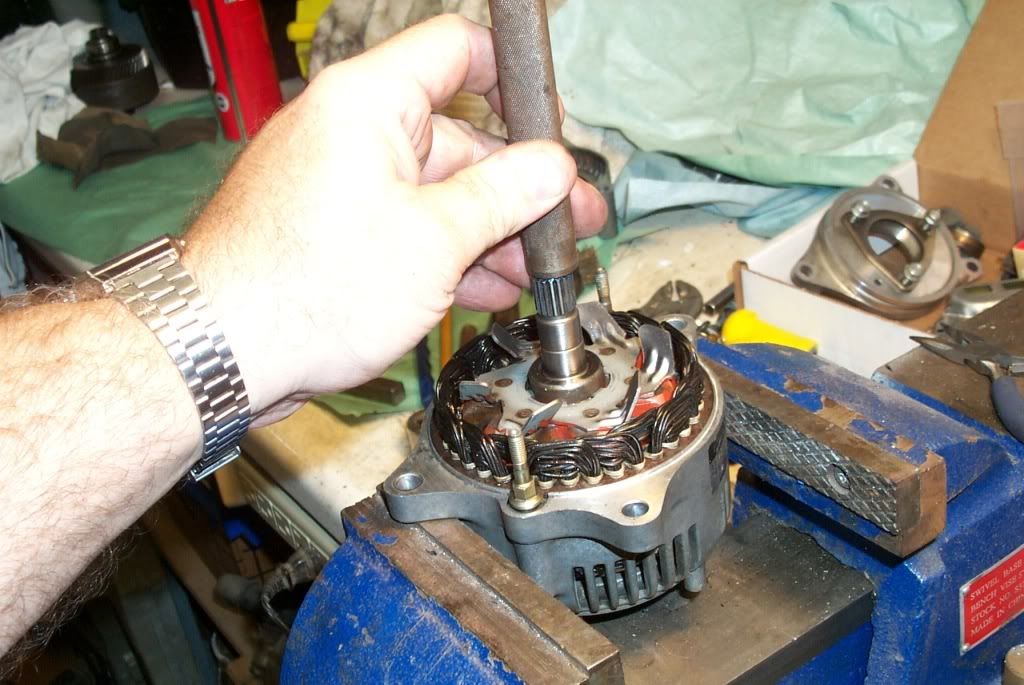
Now that the front half is removed, place the back half in the vise as pictured here:
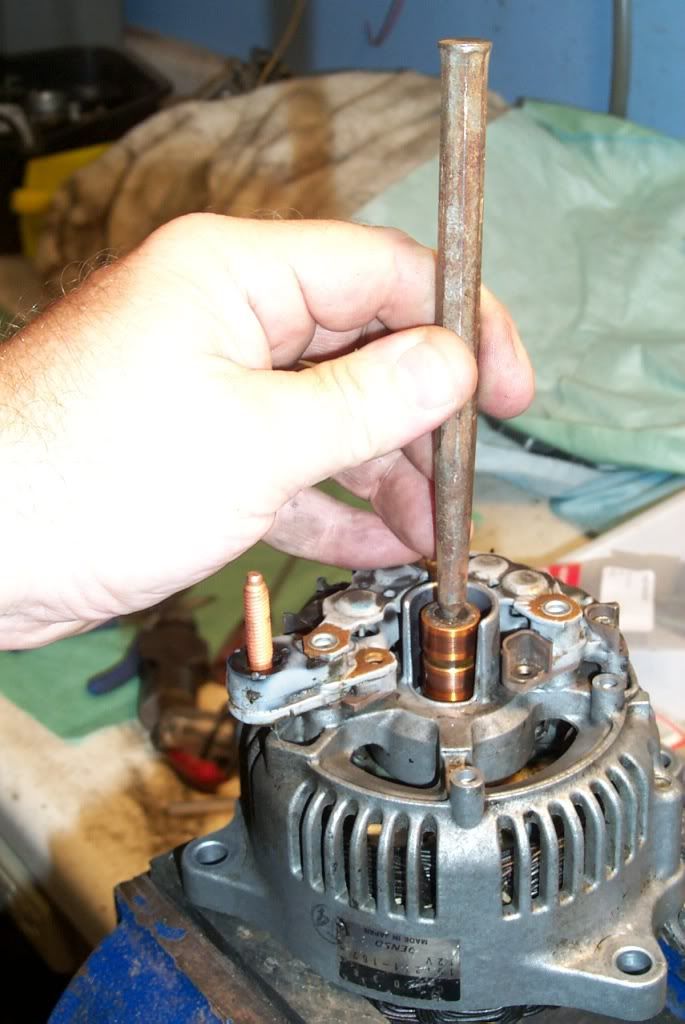
USE A POINTED PUNCH to drive the shaft out of this end so that the commutator does not get damaged!! You should be able to see a "dimple" in the end of the shaft for your punch to go in to.
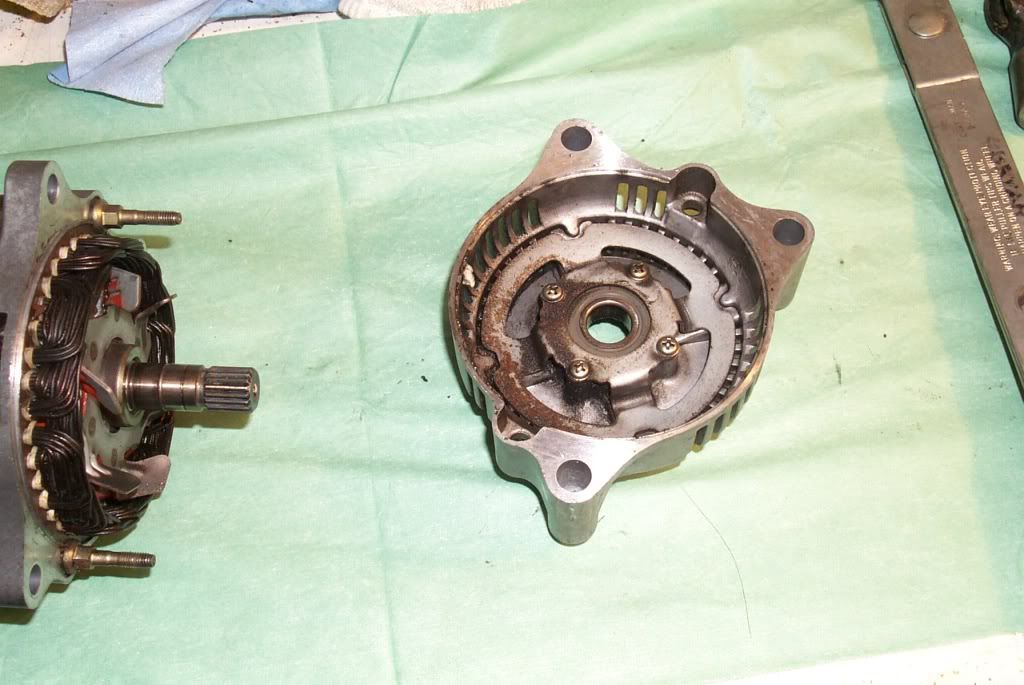
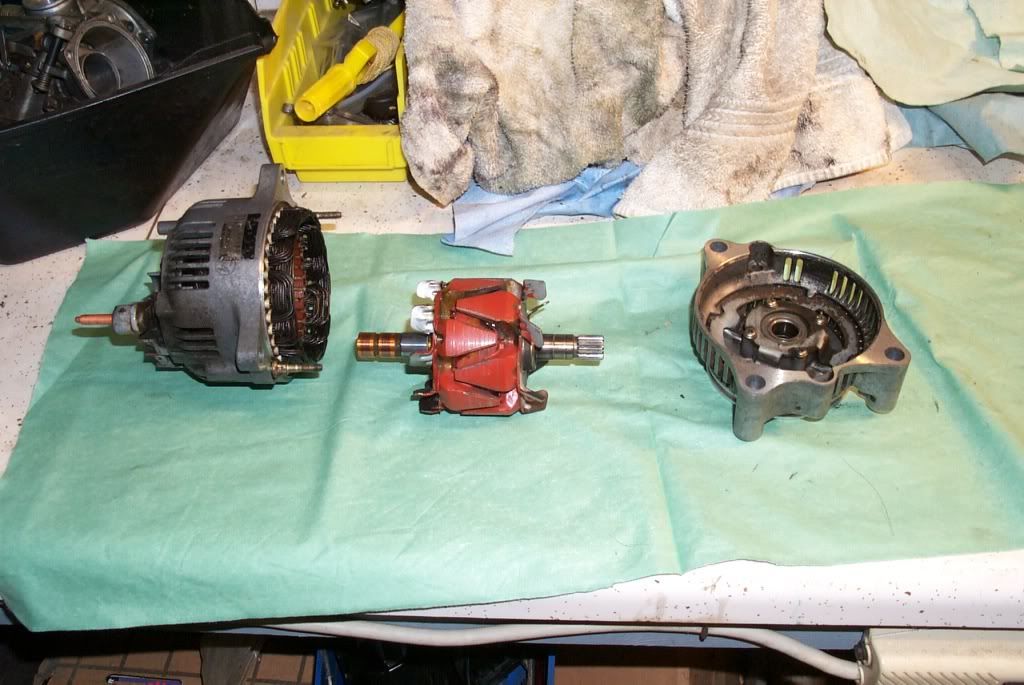
Rear housing, rotor and front housing.
Here you can see the "lipped" washer, with the "lip" pointing up. "Hmmm, how am I gonna get that out??" Tried some sockets, but none would fit without damaging the washer.
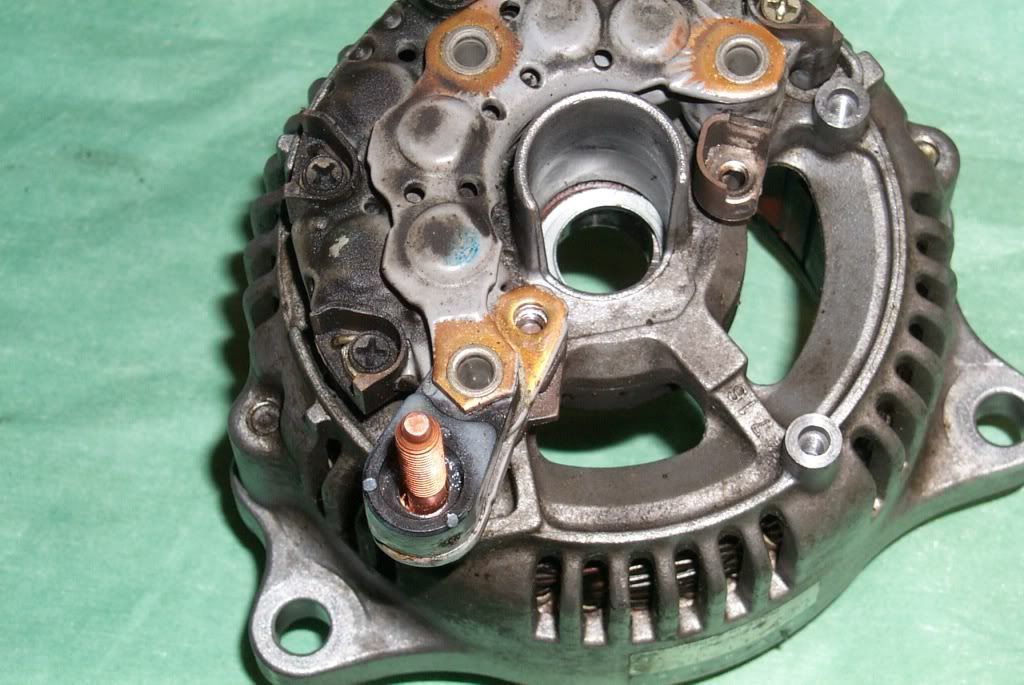
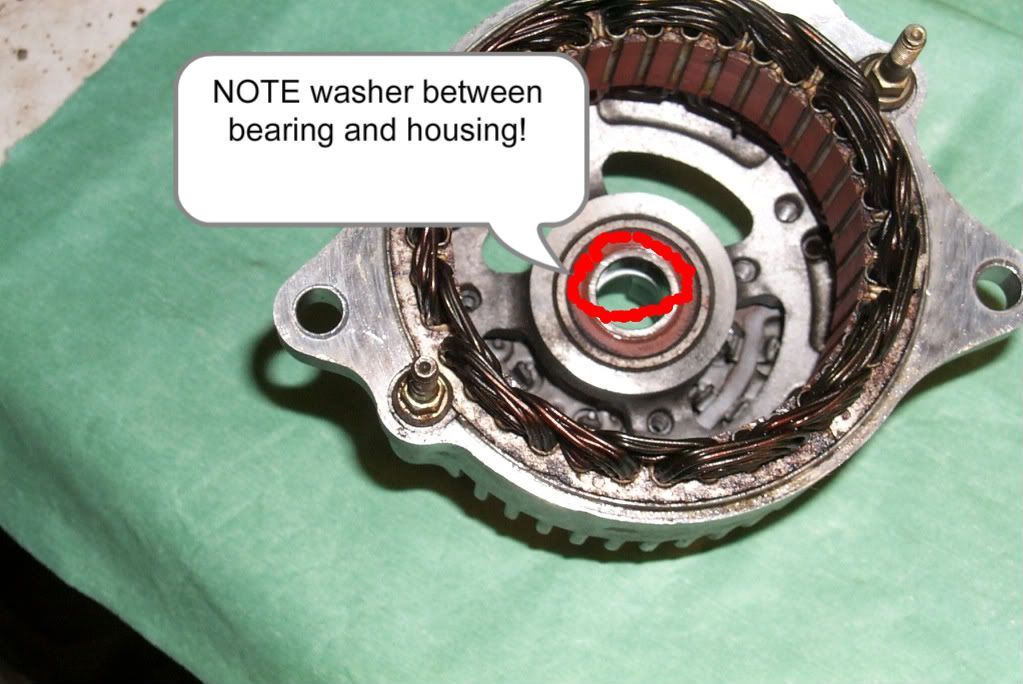
"Front" half with bearing keeper removed. "Somebody clean that up!"

Note the shim/washer...goes between housing and bearing.
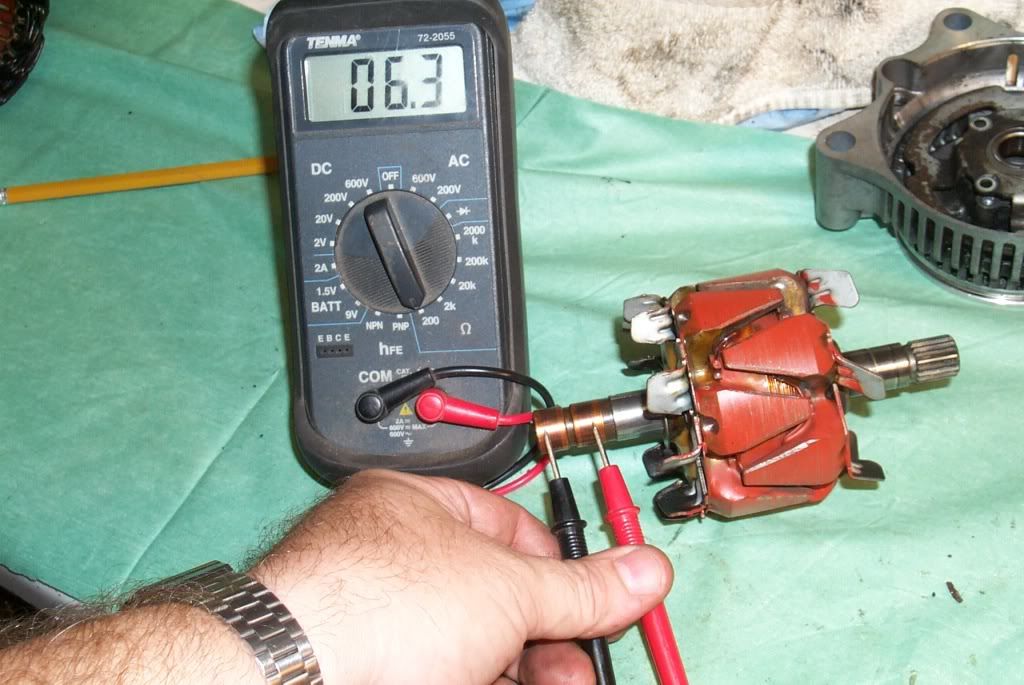
Continuity test: 6 or 7 ohms should be OK (I haven't checked the manual). At least I didn't bust the commutator!!
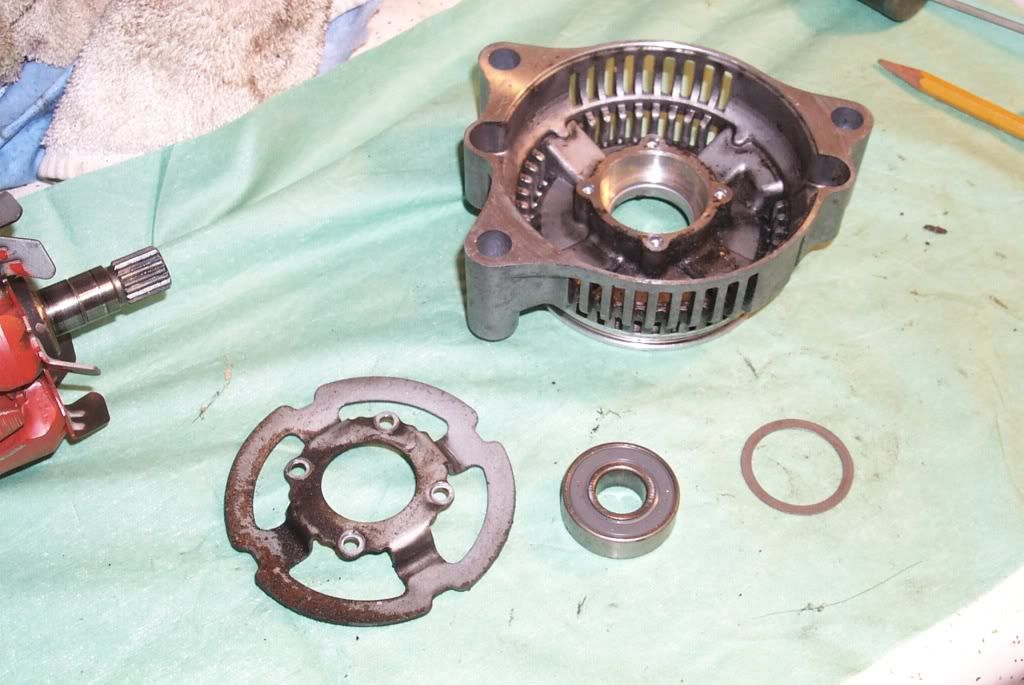
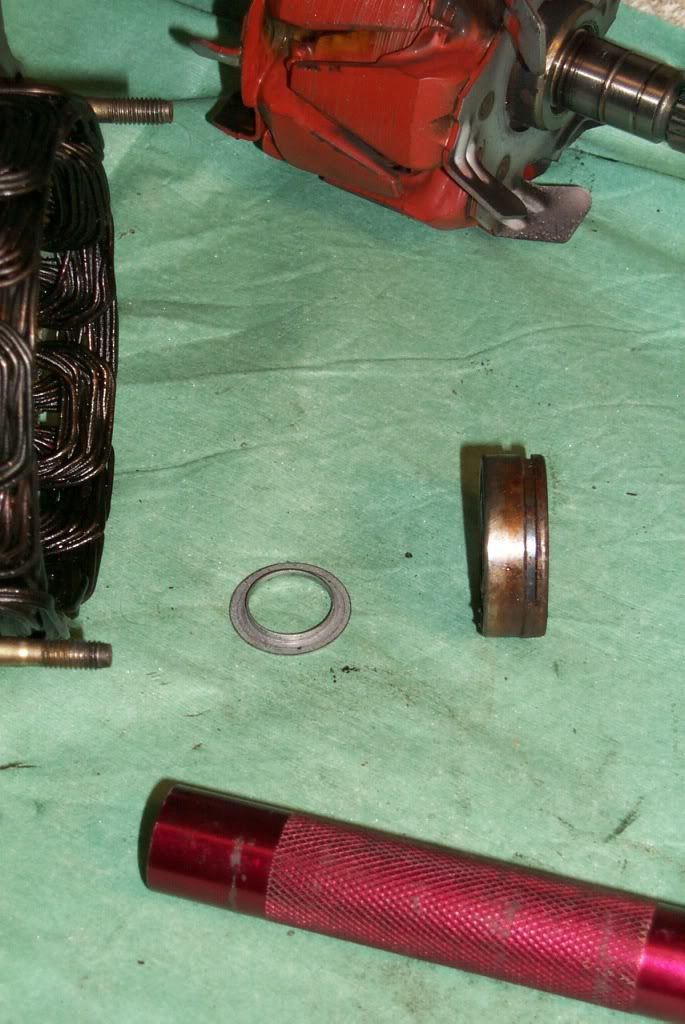
Other bearing's out!
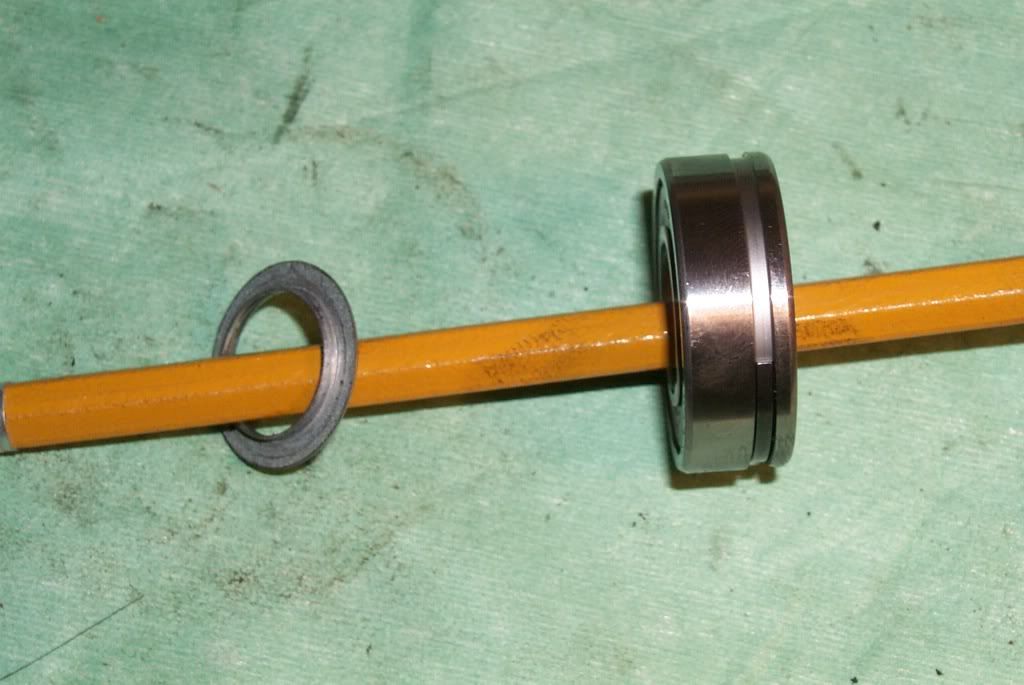
Note the "lipped" washer, and the grove on the bearing. Not sure why it's grooved, but there must be something to it!
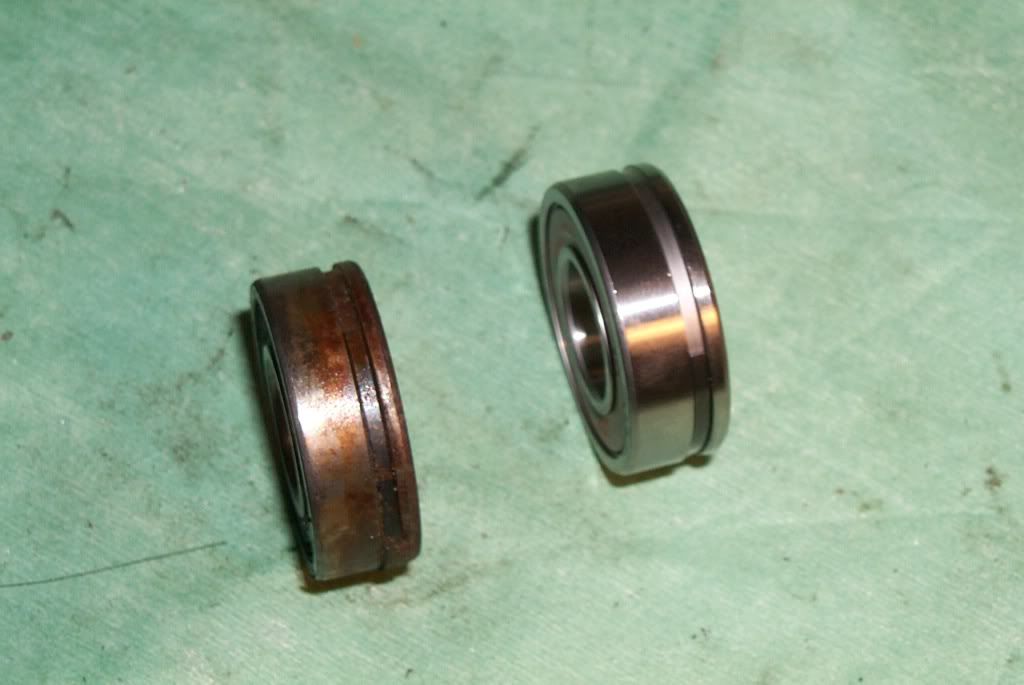
Old bearing, new bearing
Can you tell which is which??
Once the rotor has been removed, you can drive out the bearing. Pay close attention to the spacer/shim that is installed between the bearing and the rear housing.
Here's where I used my ol' Mini-mag flashlight barrel to drive out the rear bearing, making sure not to damage the spacer/shim. A piece of conduit may also work for this.
Note the "lip" on the spacer/shim and the groove on the bearing. This is the proper order/orientation for the parts to go into the rear housing, with the housing being on the left.
Rotor back in....
Here the rotor is driven back into the rear housing with the new bearing installed.
Assembly is pretty straight forward. You may want to use some assembly lube on the shafts as you press it back together.
Hope this helps!!
~~~
Part numbers:
This diagram shows four bearings total. 2 internal (34, 35), 2 external (13, 14).
NOTE: Service Honda prices as of October 2009.
Item 13 31111-MAJ-G41 BEARING, RR. $20.69
Item 14 31114-MAJ-G41 BEARING, FR. $26.84
Item 34 91002-MT3-003 BEARING (6003) $16.98
Item 35 91004-MT3-003 BEARING (20X47X10.5) $14.51
Item 12 31105-MAJ-G41 HOLDER ASSY, BRUSH $30.09
$109.11
http://www.st-owners.com/forums/showthread.php?t=55159
Written by Pat O'Bryant, aka sirepair, STOC 7105:
~~~
Alternator Bearing Replacement
You will need a vise, hammer, a punch, a pointed punch and an appropriately sized "sleeve" (I used an old mini-mag flashlight barrel) to remove the bearings.
Getting ready to split the alternator.
Once the alt has been removed from the bike and the regulator/rectifier has been removed, place it in the jaws of the vise so that you are only grasping the "front" half of the housing. Use the punch and hammer to drive the shaft, along with the back half of the housing, out of the front half. Mine was pretty tight and took some "persuasion"! Might want to soak a bit with penetrating oil.
Half way there!
I used some emery cloth to lightly clean up the shaft where the bearing resides.
Now that the front half is removed, place the back half in the vise as pictured here:
USE A POINTED PUNCH to drive the shaft out of this end so that the commutator does not get damaged!! You should be able to see a "dimple" in the end of the shaft for your punch to go in to.
Rear housing, rotor and front housing.
Here you can see the "lipped" washer, with the "lip" pointing up. "Hmmm, how am I gonna get that out??" Tried some sockets, but none would fit without damaging the washer.
"Front" half with bearing keeper removed. "Somebody clean that up!"
Note the shim/washer...goes between housing and bearing.
Continuity test: 6 or 7 ohms should be OK (I haven't checked the manual). At least I didn't bust the commutator!!
Other bearing's out!
Note the "lipped" washer, and the grove on the bearing. Not sure why it's grooved, but there must be something to it!
Old bearing, new bearing
Can you tell which is which??
Once the rotor has been removed, you can drive out the bearing. Pay close attention to the spacer/shim that is installed between the bearing and the rear housing.
Here's where I used my ol' Mini-mag flashlight barrel to drive out the rear bearing, making sure not to damage the spacer/shim. A piece of conduit may also work for this.
Note the "lip" on the spacer/shim and the groove on the bearing. This is the proper order/orientation for the parts to go into the rear housing, with the housing being on the left.
Rotor back in....
Here the rotor is driven back into the rear housing with the new bearing installed.
Assembly is pretty straight forward. You may want to use some assembly lube on the shafts as you press it back together.
Hope this helps!!
~~~
Part numbers:
This diagram shows four bearings total. 2 internal (34, 35), 2 external (13, 14).
NOTE: Service Honda prices as of October 2009.
Item 13 31111-MAJ-G41 BEARING, RR. $20.69
Item 14 31114-MAJ-G41 BEARING, FR. $26.84
Item 34 91002-MT3-003 BEARING (6003) $16.98
Item 35 91004-MT3-003 BEARING (20X47X10.5) $14.51
Item 12 31105-MAJ-G41 HOLDER ASSY, BRUSH $30.09
$109.11
Title: Re: Alternator Bearing Replacement - 40 amp ( ST1100 )
Post by: KoTAOW on October 05, 2009, 11:12:22 AM
Post by: KoTAOW on October 05, 2009, 11:12:22 AM
Comments by Julien d', STOC 7236:
I too did this replacement in early 2009.
The front bearing was easy to find, but the rear bearing was supposedly discontinued (as told by my local Honda dealer), even if the same bearing is used on the 1300 as well.
The bearing is a 15x32x11 with a spring clip. The 15x32x9 is easy to find, but is 2mm narrower. It should work, but I wanted to replace the bearing with the same thing.
Here comes Suzuki to the rescue. The needed bearing is used in many of their motorcycles including the Bandit, Katana, etc. The alternators are probably the same or very similar.
The Suzuki part # is (in Canada anyway) 31612-48B00 (the last 2 are zeros).
Make sure you position the spring clip correctly. Looking closely at the bearing reveals that the groove is deeper on one side than the other.
I hope this helps.